Part V: 2008 - 2010
Building a Passive Solar Slipform Stone House
An Ongoing Journal of the Adventure with Builder and Author Thomas J. Elpel
Photos by Thomas J. Elpel
Be sure to read
Part I: April, May, and June 2005
Part II: September, October, and November 2005
Part III: March through October 2006
and Part IV: 2007
.
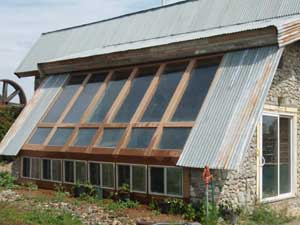 We finished the trimwork on the greenhouse. |
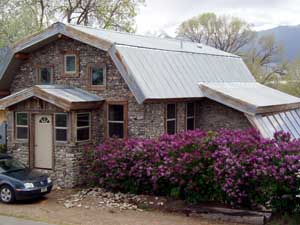 It is great to see the lilacs in bloom. |
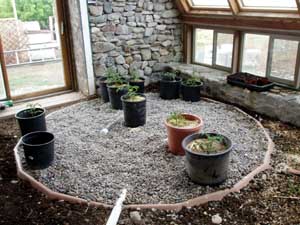 We installed a greywater filtering system in the greenhouse. |
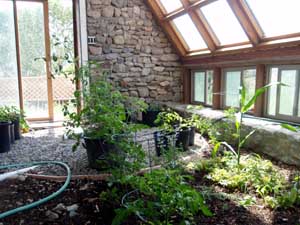 We were thrilled to start planting the greenhouse. |
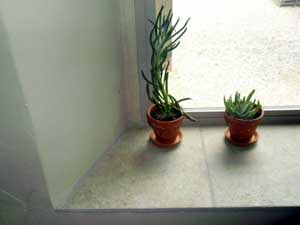 Kris laid tiles in the window wells. |
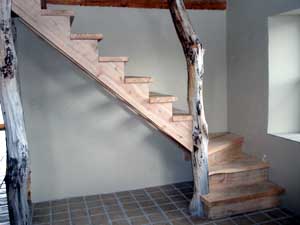 We built stairs up to the loft. |
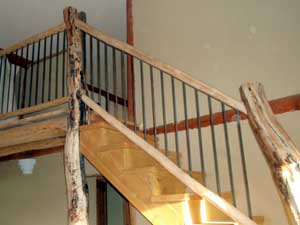 The railings are built with poles and rebar. |
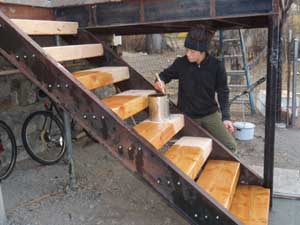 We also built stairs to the deck behind the house. |
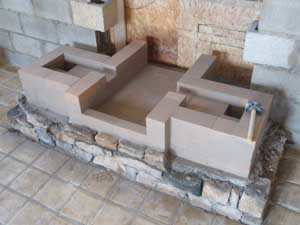 We began laying the brickwork for the masonry fireplace. |
 Building the arch for the fireplace. |
 The floor of the baffle system. |
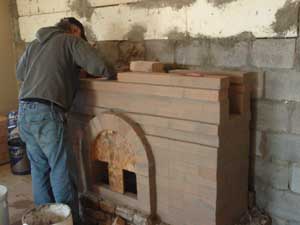 Building the first layer of baffles. |
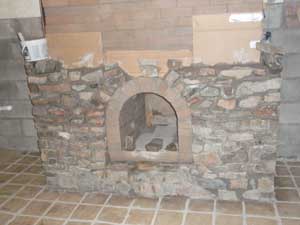 Doing stonework up the outside. |
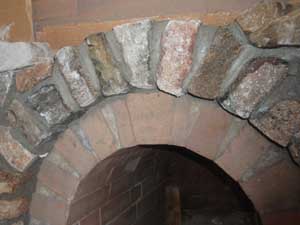 Close-up of the arch. |
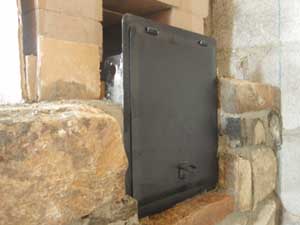 Clean-out doors provide access to the baffle system. |
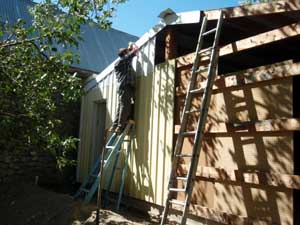 Dismantling the old garage. |
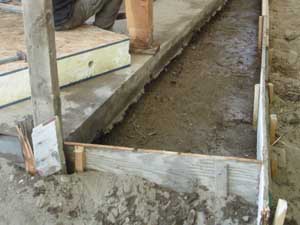 Formwork for new footings will square the garage with the house. |
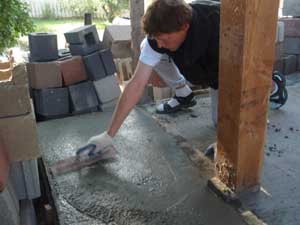 We added rebar, then called a concrete truck for a four-yard pour. |
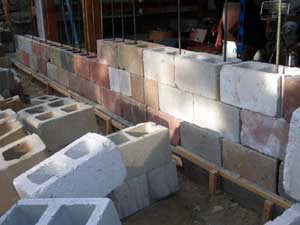 We dry-stacked cinderblocks to make the walls, then added rebar and poured the cores with concrete. |
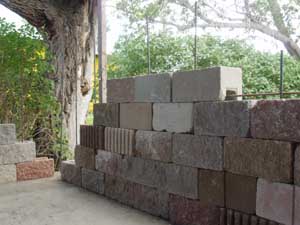 The cinderblocks were free from the junk pile at the factory, with many different styles, colors, and textures. |
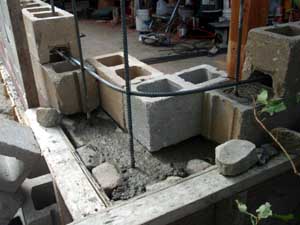 We left a few cinderblocks out at the corner and did slipform stone masonry to visually connect the garage with the all-stone house. |
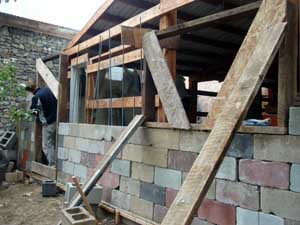 A door and window frame were added to the back wall. |
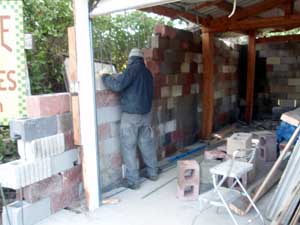 Working with cinderblocks goes much faster than any stonework we've ever done. |
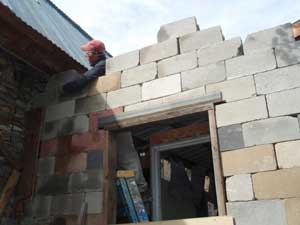 Angle iron was used to bridge the openings. |
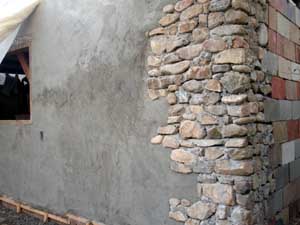 We stuccoed over the cinderblocks, leaving the corner stonework exposed. |
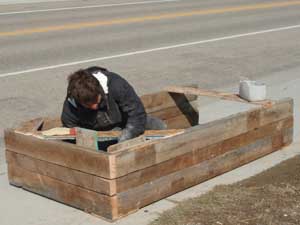 Mike built a door frame for the front wall. |
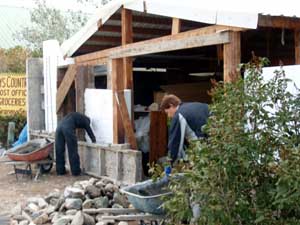 We did the front wall with slipform stone masonry, like the rest of the house. |
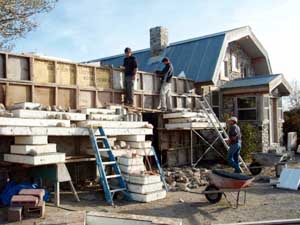 We built the entire front wall in one week. |
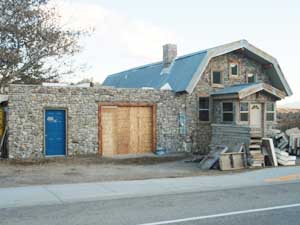 The garage has a false front. |
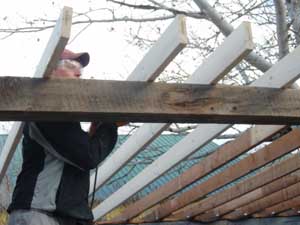 We finally dismantled the original roof and started building a new one. |
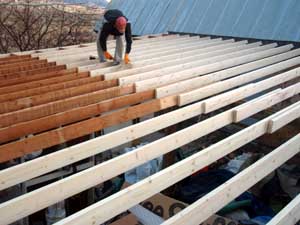 It is a shallow sloping shed roof hidden behind the false front stone wall. |
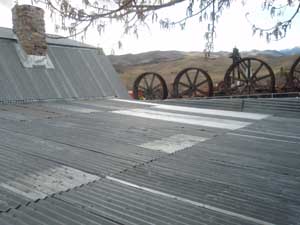 We covered the garage with secondhand galvanized roofing. |
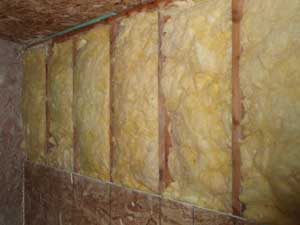 Inside the garage, we built frame walls, then wired in outets and insulated with fiberglass insulation from the dump. |
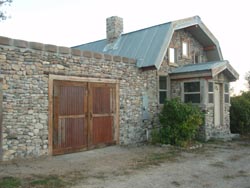 We completed the false front and installed four-inch thick insulated garage doors. |
2008 was a low-key year for construction on the stone house. We wrapped up a number of projects around the place, but like any home-building project, the closer we get to the end, the longer it takes. I spent January, February, and March finishing my new book, Roadmap to Reality. Kris and Sholei both visited for a little while and helped out with the house. Then we headed south for a three-week walkabout in Arizona.
Renee and I found ourselves struggling with our marriage, for reasons unrelated to the house project or the internship program. But we took some time off from the internship program while we tried to figure things out, which greatly slowed down work on the house. Fortunately, Kris spent much of the year with us. He cut and cemented tiles into the wide window sills around the main level, and installed light fixtures all over the house.
We completed the front porch, including plastering the walls, tiling the floor, and finishing the electrical work, plus we built stone steps up to the door.
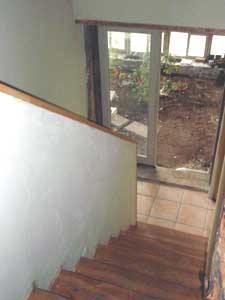 This is the stairway down to the greenhouse and basement. |
In the greenhouse, Kris finished the greywater treatment system. Wastewater from the sinks and shower is filtered through a mesh bag into a fifty-gallon plastic barrel. The barrel can hold a large flush of water, which then trickles through a pipe into the treatment pond. Microorganisms on the gravel break down pollutants in the water before it is discharged outdoors for irrigation. We also embedded potted plants in the treatment pond, to water them hydroponically. With the turn of a valve, the waste water can be diverted to the septic system instead of the greywater system.
It was exciting to plant the greenhouse. We grew a nice crop of salad greens and tomatoes over the summer, with more still coming on for winter.
My daughter Felicia got a puppy in the spring and carried him up and down the ladder to the loft as he got bigger and bigger. I finally built a stairway, using some interesting willow logs as posts. I purchased some rough-cut Douglas fir wood for the treads and installed pine boards as risers. For railings I used lodge pole pine, with 1/2" rebar spaced about four inches apart for balusters.
We also finished the stairwell to the basement, which included plastering the walls, sanding and finishing the wood treads, and tiling the landing.
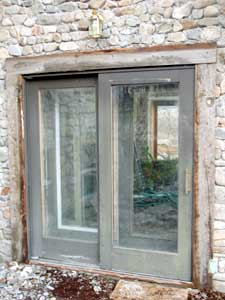 Two sets of doors on the greenhouse double the protection from winter cold. |
We poured a concrete deck on the metal framework behind the house, using miscellaneous junk wire for mesh to tie it all together. My son Donny helped out with the project. I mixed an odd assortment of leftover paints together into a large bucket, then added a can of paint to each batch of concrete for strength and color. We poured most of the deck with straight concrete, then added a thin layer of mortar without gravel over the top and hand-troweled it smooth.
A critical component for keeping the structure warm is the airlocks on every entry. The front porch airlock is now complete, and so is the west end of the greenhouse. We check the thrift store for secondhand sliding glass doors and French doors every time we go to town. The west end of the greenhouse has a sliding glass door on the outside, with a French door on the inside. That way we can close both sets of doors in cold weather. It takes a little patience to wait for the right doors to show up at the secondhand stores.
Our internship program started up again in October when Matt bicycled out from New Jersey to visit. I met Lauren at Rabbitstick Rendezvous and she came up to spend part of the winter and tan hides. Lauren plastered and painted her bedroom in the basement. We also built stairs up to the back deck and started gathering truckloads of rocks to build the fireplace. Matt and Lauren both left in January, then Kris returned for awhile. We went car camping and bicycling in Death Valley in February, then Kris took Donny canoeing down the Colorado River for three weeks, from the Hoover Dam all the way to Yuma.
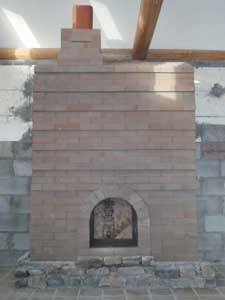 The completed brickwork for the masonry fireplace and baffle system. |
Building the masonry fireplace was the big project for the spring of 2009. Joseph flew out from Saint Louis, Missouri at the beginning of March and stayed for six weeks to help out with the masonry work. Joseph worked as a civilian contractor doing aircraft repair in Saudi Arabia and Iraq through most of the Iraq war. I corresponded with him via email over several years about masonry fireplaces, and he was excited now to get the chance to do a hands-on project.
The masonry fireplace is also known as a masonry heater or Russian fireplace, and has a series of baffles to extract the heat from the exhaust. The woodbox door is often placed on one end and has a solid metal door. However, the style we build has a fireplace-look with a glass window in it, so I use the term "masonry fireplace."
We built our first one ten years earlier in our own home. This was my first chance to try out the next-generation plans outlined in my book Living Homes. One of the key differences is that the new fireplace is positioned against the garage wall, with a glass door in the house and a metal door in the garage. Instead of hauling firewood into the house - and making a big mess along the way - a person can take a couple quick steps into the garage and put the firewood in from that side.
While our first fireplace was built at ground-level, the new one is suspended above a full basement. The finished fireplace probably weighs between 15,000 and 20,000 lbs., so we definitely needed good support to prevent it from falling through into the basement! For support, we formed two wall stubs out from the perimeter wall when we poured the basement a few years back. The fireplace also rests on the perimeter wall, so it is supported on three sides. The first step in building the fireplace was to pour a heavily reinforced concrete slab, with rock-facing around the edges, to connect the three supporting walls. We used 5/8" rebar and a lot of it, to tie it all together.
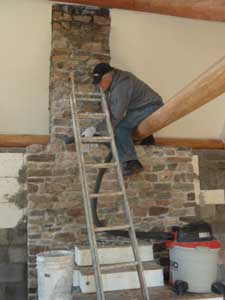 Vacuuming up bits of mortar from our stonework. |
In my first fireplace, we only mortared the brickwork for the arched fireplace, then did stonework around it and supported a baffle system of dry-stacked firebricks above that. I'm not sure if that was a good idea or not, since it may be possible for the unmortared bricks to shift over time. Fortunately, we have not noticed any problems in our first ten years.
The plans in Living Homes are designed with mortared brickwork all the way up, including chambers on each side of the firebox to support the baffle system, so that all of the brickwork can be completed before doing the stonework up the outside. That is definitely a more professional approach than our original design, although it proved to be more work than I anticipated.
Interestingly, the mortar joints are supposed to be very small when working with fire bricks and refractory cement. The mortar is used more as a filler than a binder, and so the joints should be no more than 1/8" thick. It took some practice to learn how to do that, and many of our joints are larger, especially mine. Joseph seemed to have the better knack for doing thin joints. It was also necessary to soak all of the firebricks in a bucket of water, since they are super-absorbent and tend to pull the moisture out of the mortar right away, if not properly soaked beforehand.
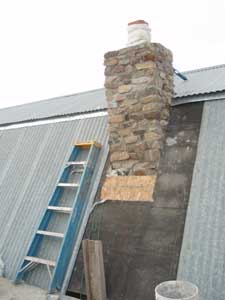 Working on the chimney. |
We started with several courses of flat brickwork, than built formwork for the arch. Although it takes some time and skill to do a nice arch, I like this part of the process the most; it seems more organic and out-of-the-box compared to the flat and square brickwork. We designed the arch so that the top of the brickwork came out level with the courses coming up the sides, then made the floor for the first level of the baffle system.
The baffle system consists of six horizontal runs starting with the exhaust from the fireplace in the middle. The smoke splits and runs to the outsides, goes up and comes back to center on the next level, with three sets of these out and in baffle pairs. We installed three clean-out doors on one end of the fireplace to access each of the six horizontal runs. The ashes are scraped from the top level down to the next level, on down until they fall into the firebox.
Although I can go months without eating a candy bar, Joseph and I started treating each other with candy bars from our store next door. Some days we were eating three candy bars each, which can really pack on the pounds in a hurry! It was kind of fun to indulge for awhile.
I filmed the building process, which added some time and complication to the job, but I am putting together a how-to video about building masonry fireplaces.
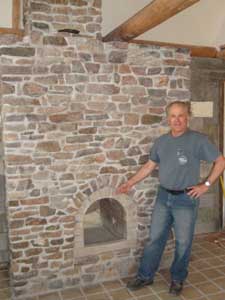 Joseph stands by our monument. |
We completed the brickwork all the way to the top, perfecting our brick-laying skills along the way, before we started the stonework. Then we started back at the bottom and did stonework layer by layer up to the top. Weather-wise, I think it snowed about every three or four days while Joseph was here. It was great to get all the moisture, since we really need it, but it makes the masonry work more challenging, especially when the rock pile is covered in snow. Since the batches were small, we mixed most of the mortar with a hoe in a wheelbarrow in the greenhouse.
We eventually ran out of rocks and had to get another couple truckloads, which was a bit of a problem, since there was still too much snow in the mountains to get back to our original source. However, we found enough rocks nearby that were similar in color, so they seemed to blend well in the fireplace. We finished the stonework of the fireplace and ordered custom-made doors before Joseph went home in mid-April. We did the stonework up the wall beside the fireplace after that.
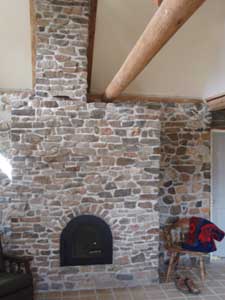 Adding doors to the front and back completed the fireplace. |
The fireplace was one big project, and that was enough for awhile on the house. On the outside, we added ten yards of manure to the gravelly yard, attempting to build soil for a garden. We built some nice stone pathways and put up a tipi for our programs for public school kids. We did our annual junior high camping trip on a nearby ranch, and later in May, we spent a week canoeing the Mussellshell River in central Montana. The week was exceptionally hot, which was nice being on the river, but completely fried our fledgling garden.
In mid-summer we hired a backhoe to dig a trench from the north side of the house out to the septic tank. Originally, the bathrooms were all intended to be on the south side of the house, but we made some design changes as we went along, and now needed a drain on the north side. Putting the pipe in was relatively easy, but we only hired the backhoe to dig the trench, so it took several sessions over a couple weeks to shovel all the dirt and rocks back into the hole. Ginny and Jake spent a few weeks with us in July and helped fill in the hole, along with doing some primitive skills.
I spent much of the summer preparing for a primitive trip, then spent most of August with friends out in Washington, participating in an all Stone Age living experience. Work on the stone house resumed in late September, when new interns Mike and Brandon came to stay for awhile.
big project for fall was to take down the old wood-frame and sheet metal garage and replace it with a new masonry garage attached to the house. The only problem was that the old garage was out-of-square with the house and full of stuff. Therefore we had to keep the old garage and roof intact as long as possible while building its replacement.
Since the new garage would be connected to the house, there were only three new walls to build. We dug out around the slab and built formwork to pour new footings that would make the garage square with the house. We removed the steel and framing from the two walls of the old garage that faced the yard, keeping only the support posts in place while we worked. It was very disorienting to try and determine square with the old walls at odd angles to the new ones.
We hammer-drilled holes into the existing slab, and pounded short lengths of rebar in to connect the old concrete with the new. Then we ordered four yards of concrete to pour the footings. The truck poured the concrete in our wheelbarrows, which we rolled through the garage and dumped into the footings. We had a small amount of concete left over, so we added the first row of cinderblocks on top of the still-fresh footings, and filled the cores with concrete.
I haven't worked much with cinderblocks in the past, but I learned that I could get them for free off the junk pile at the factory. I started hauling them home a few at a time, whenever I was passing by the factory and had extra room in the truck. Over the course of the year, I had collected enough cinderblocks to do the two walls of the garage that faced the yard. I was kind of sick of stonework from building the house anyway and eager to try something different. I figured that stuccoed cinderblocks would be a whole lot faster than stonework, and we could add a few stones here and there to visually connect the garage with the house.
The cinderblocks were of several different styles, colors, and textures. We mixed them all together, keeping the smooth side out, so that we could do a nice stucco job over it. For speed, we dry-stacked the cinderblocks, going up several levels at a time, then went back and poured concrete in the cores. For strength, we added rebar to every core. Maybe it is overkill, but that is the way I prefer to build.
Many of the cinderblocks we used in the middle of the wall were actually corner pieces, which were longer than the other cinderblocks. That threw the spacing off a bit and left gaps between many of the blocks. It was weird to pour all the cores with concrete and still be able to see right through the wall. Fortunately, the gaps were not a problem, since were would later surface-bond the blocks together with stucco mortar, both inside and outside the wall.
Some of the cinderblocks were notched to allow placement of horizontal rebar. We set these blocks aside and used them in the fifth row, placing horizontal rebar all the way around the structure to better tie everything together.
At the corner of the building, we left a few cinderblocks out, then used slipforms to do some stonework. I spaced the slipforms 3/4" out from the cinderblocks, so that the stonework would protrude out of the stucco work when the wall was complete. For convenience, I stacked up cinderblocks along the inside of the corner as formwork for my stone and concrete. Those blocks were removed after the stonework was done.
I really liked the combination of cinderblocks and stonework. Compared to an all-stone wall, the cinderblocks stacked up really quickly, and it did not take long to slipform up the corner. I could see doing an entire house by this method, making a nice, sturdy masonry house from the cinderblocks, with stonework randomly added throughout the walls for aesthetic appeal. This constitutes a fundamentally new approach to building. I guess I'll start collecting cinderblocks for the next project!
We built a door and window frame out of rough-cut lumber salvaged from the local dump and bolted them to the cinderblocks. We bridged over the openings with 1/4" thick angle iron placed inside and outside the wall. Above the openings we placed another horizontal run of rebar, which continued all the way around the wall.
We did not have enough cinderblocks to do the front wall of the garage, so we left that part for last, but staggered the joints on the cinderblocks at that front corner so that the stone wall would bind nicely into the cinderblock wall. For convenience, we finished building the two cinderblock walls before starting the front wall. We made the back wall of the garage angled to match the new shallow-sloping shed roof we would be building; we went up as high as we could with cinderblocks, then did formwork and poured a bond beam following the desired slope of the roof.
Unfortunately, we were hit by a freak cold spell in early October, with temperatures dropping into the teens. We insulated our concrete work as best as we could, threw a big sheet of plastic over the entire structure, and set up a barrel stove to add a little bit of heat. We did not know if we would get much farther with the building process before winter stopped us in our tracks. Fortunately, the weeks to come were amicably warm, and we were able to complete the critical masonry work.
 We stuccoed over the cinderblocks inside and out. |
When the weather warmed up, we mixed up some stucco mortar and troweled over the cinderblocks. We added leftover cans of latex and acrylic paint to the mortar for better adhesion to the cinderblocks, plus plastic reinforcing fibers to surface-bond the blocks together. We troweled the mortar as smooth as we could on the outside, troweling it in around the rocks for a nice stone and stucco combination. We will eventually grout between the rocks for a more finished look.
Stuccoing the inside walls probably wasn't absolutely necessary, since we filled all the cores with concrete and rebar and surface bonded the outside. We would later build frame walls there to hold the insulation and wiring, so the cinderblocks would not be visible. However, I felt it prudent to surface bond the blocks together for extra strength, so we troweled our fiber-reinforced stucco mortar over the interior before starting the front wall.
We built the front wall of the garage much as the rest of the house was done. We put up the insulation panels first, framed in the door openings, then did stonework up the outside. I did not acquire any more free insulation panels for this project. We had a number of panels left over from the house and decided to use them up. I understand that the factory has since found a way to recycle their insulation panels anyway, so that would be a better use of them. We hot-wired our thickest insulation panels down to 8" thick pieces, which should be more than adequate for insulating a garage. We saved the larger pile of 6" panels to insulate the roof.
By this time, our insulation panels were not just factory scraps, but scraps left over from our building process--in other words, we were building with scraps from scraps. We struggled to piece together enough junk to insulate the whole wall, but managed to make it work.
I feared that the front stone wall might take a long time, or that winter would settle in before we could get it more than half done. But actually, we built the entire stone wall in one week, thanks especially to the large door openings that took up lots of space.
For passersby, it may have seemed like an instant stone garage. We left the front of the metal garage intact while we were building the cinderblock walls in the back, so the garage didn't look much different from the street until we started on the front. One week it looked like just a steel building. A week later the steel was gone and a historic-looking stone structure stood in its place. Numerous people stopped to comment on it the day we took off the forms to reveal the stonework.
That is the strange thing about slipform stone masonry. It does go quickly, and I am always astonished at how rapidly a very-permanent, castle-like wall can appear from nothing. On the other hand, this is our fifth year working on this house, and I cannot believe that I have spent most of the last five years of my life working on the same dumb project. This house has been significantly more labor-intensive to build than our own house was. I would very much like to learn to massproduce low-cost, high efficiency super-insulated stone houses, but this definitely isn't the way to do it!
After completing the front stone wall, we closed in the garage door opening with oriented-strand-board until we can get around to building an insulated door. I bought a blue-painted steel door at a secondhand building supply store and installed that. We will repaint it in the spring. Then we dismantled the old garage roof and started building the new one.
We assembled a laminated beam from some salvaged rough-cut 2 x 6's, supported by posts on each end and in the middle. With this beam across the middle of the garage, we could splice the rafters together on top of the beam to span the entire opening. I hoped to recycle all the 2 x 6 lumber from the old garage into the new roof, but most of the boards were a couple feet too short. That is one of the challenges in working with recycled lumber--there are always short pieces available, but seldom long ones.
With the barn-style roof of the house, we managed to build the entire roof without any rafters at all. However, the long span of the garage roof left us no choice. I had to buy a small pile of lumber to finish the roof.
I would have preferred to leave the rafters exposed inside the garage and insulate on top of the rafters with our 6" insulation panels. However, that would make the roof thick enough that the upper end would be higher than the false front. So we screwed sheets of OSB onto the underside of the rafters, then ran the insulation panels through the table saw to make them fit between the rafters. We used our best insulation panels first, then cut up scraps, then scraps of scraps, then scraps of scraps of scraps, piecing everything together to fill the roof completely. We used a bunch of cans of expanding foam sealant to fill the skinny gaps, plus I add some left over pour foam which we used in the bigger gaps. But we still came up short on the insulation, so I bought some bags of perlite and poured into the remaining holes.
Insulating the garage roof with fiberglass batts might have taken a few hours. We managed to spend most of a week tinkering around with scraps of insulation, but I was glad to use them all up. Frankly, I've about had my fill of working with beadboard panels, so I'm glad the factory has found a way to recycle their scraps. I won't be tempted to build something else with them.
Mike took off for college, but Brandon and I continued working on the roof, keeping the project moving along. However, our "days" grew shorter and shorter as we went deeper into winter. With less light and colder weather, we worked a lot of three-hour days and completely quit for awhile, but before spring rolled around, we finally finished the roof. I bought a big pile of secondhand galvanized roofing at The Restore, then sorted through it to find the best pieces, coming up with just enough to cover the entire roof.
In the spring of 2010, we built frame walls inside the garage, along the cinderblock walls, for the purpose of wiring and insulating the structure. After completing the rough wiring, we put up OSB on the lower half of the walls and poured in a mix of sawdust and lime for insulation. The upper half we insulated with fiberglass batts, mostly salvaged from county dumpsters, then finished covering it up with OSB and painted the interior white. Although not completely finished, the garage was adequately complete to load it up with ten thousand copies of the newest printing of my book Botany in a Day and five thousand copies of Living Homes.
Kris returned from Colorado and helped guide new interns Laura and Sky in doing the insulating and finish wiring. They all arrived in time to help out with our primitive skills programs for public schools. Laura and Sky stayed with us for a little over a month before heading off to other projects. Kris stayed for three months, and we wrapped up a few projects, such as plastering the basement, but mostly spent time with the boys at home in Pony.
Wrapping Up
The gradual winding down of the internship program (and work on the house) over the past three years or so was unfortunately linked to the decline of my marriage. Having long ago emotionally separated from each other, Renee and I kept our marriage and businesses going by momentum alone, but it eventually caught up with us. We spent three years trying to work things out, trying to reconnect and find a way to keep it going. But we finally decided it was over in early 2010, although we both vowed to continue our friendship.
On the bright side, our separation was relatively easy, since we had two houses and two businesses, and the kids were already accustomed to living in two places. I wrapped up a number of projects on the stone house, installing insulated doors and finishing the false front on the garage, plastering and wiring the basement, and installing a new dishwasher and stove in the kitchen. Originally intended for the internship program, the stone house became Renee's home, almost as if the universe somehow planned it that way. I returned to our original home in Pony to start from scratch in envisioning and creating Green University®, LLC.
I tested out many materials, design concepts, and theories in the construction of the stone house. I was shooting for 100% solar, so that the fireplace would be an optional comfort, rather than required for heating. The house, unfortunately, fell short of that goal, but with some additional fine-tuning could potentially come close to it. I definitely like the double-door design, where every door way features two sets of doors for added protection from winter cold. I also like having the loading door for the fireplace in the insulated garage, which makes it possible to stoke the fire without tracking a mess of woodchips into the house. I love the loft bedroom, where a mattress on the floor in front of the window provides an amazing view out over the landscape. I felt so much more connected to the outside world while laying there in bed gazing out the window.
I also learned a ton about different types of building materials and how to work with recycled junk. And although I liked building the walls and roof without any studs or rafters cutting through the insulation, I decided I did not like the beadboard structural insulation panels that much after all, even if they were free. I was delighted when the manufacturer started recycling all of their scraps. In fact, I felt that excessive reliance on manufactured materials and methods actually increased the labor cost of this particular project. I've found myself dreaming of using more natural materials on future projects, particularly on the interior of the house. Our original home in Pony has a lot of stonework, wood, and textured/painted concrete inside the house, and I definitely like that better. I definitely want to build another house, and hopefully this time, we can increase the energy efficiency even more, and complete the thing in a year or two!
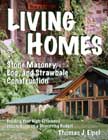
Check out Living Homes: Stone Masonry, Log, and Strawbale Construction.


 DirtCheapBuilder.com


