Part I: April, May & June 2005
Building a Passive Solar Slipform Stone House
An Ongoing Journal of the Adventure with Builder and Author Thomas J. Elpel
Photos by Mike Musialowski and Thomas J. Elpel
 Dismantling the trailerhouse. |
 We did most of it in a day. |
 Stripped down to the trailer frame. |
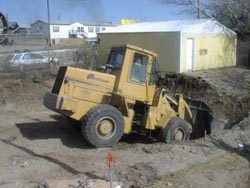 Excavating the building site. |
 A big hole to fill. |
 We framed the footings with lumber from the trailer. |
 We used 30% fly ash replacement for cement in the concrete. |
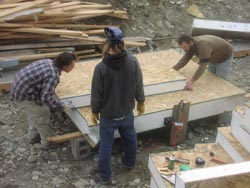 The beadboard panels were free from the factory scrap pile. Here we are splitting them with a hot wire. |
 We formed the basement walls with scrap beadboard panels reinforced with scrap lumber from the trailerhouse. |

Leveling the top. |
 We had lots of great help on the day of the pour! |
 Sewer pipes were connected to the existing septic. |
 The window frames were built from beadboard panel scraps. |
 Setting slipforms as guides for the stonework. |
 Mixing concrete. |
 The stonework revealed. |
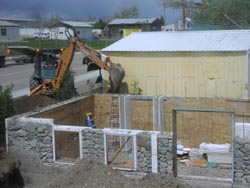 Backfilling around the foundation. |
 A bit more stonework. |
 I-beams from the trailerhouse floor were welded together to make the deck. |
 Supporting posts were welded to the deck, then we poured the concrete under them. |
 Stonework beneath the deck. |
 We partially filled, then leveled and tamped the basement floor. |
 We added a layer of plastic, plus PEX radiant floor tubing. |
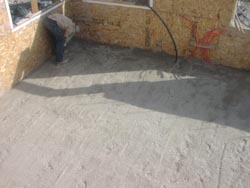 Then we hauled in sand to bring the base up close to floor level. |
 We grouted the stonework facing the highway. |
 I peeled a forty-foot log with the Log Wizard to use as a beam under the floor. |
 Moving the beam in place. The other log was temporary. Vertical supports were added later. |
 Installing the joist logs required a bit of trimming and shimming. |
 We drilled holes through top log, then pinned it with rebar into the log below. |
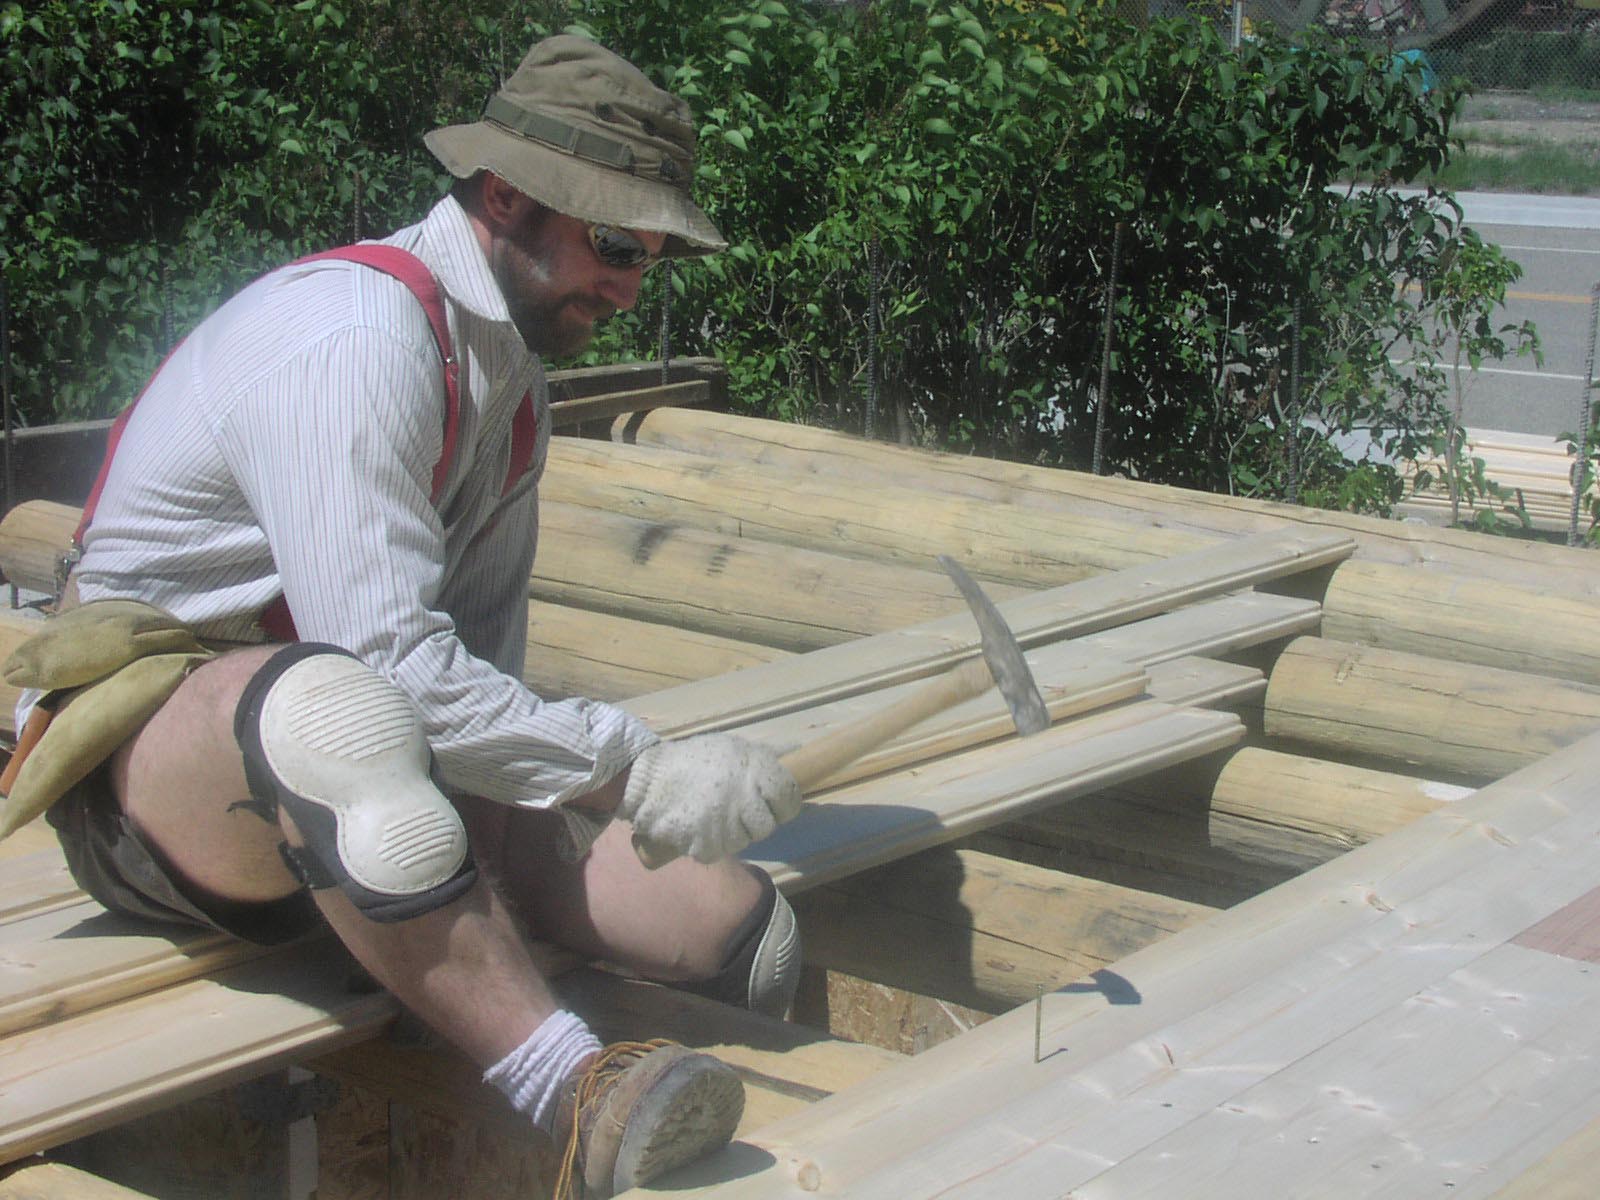 Nailing on the tongue-and-groove decking. |
 View from the street. |
 The basement ceiling. |
 Is it still possible to build a low-cost, super-efficient passive solar house of stone? This article is a step-by-step account of the process of building the 2,300 square foot stone house pictured here. |
The era of fossil fuels is coming to an end, but we cannot merely substitute other fuels, such as firewood to make up for the loss of fossil fuels. That isn't sustainable either. The only truly sustainable option is to make every new building so energy efficient (and to retrofit every existing building) such that we will not need any energy other than sunshine to keep them cozy. But some would argue that houses built to that standard would be cost-prohibitive, much more expensive than a traditional, energy-wasting home. I disagree.
Having built our own reasonably energy-efficient, mostly passive solar stone and log home for $10 a square foot in the 1990's, I found myself wondering, "Is it possible to achieve 100% passive solar heating on a shoestring budget?"
In April of 2005 we broke ground on construction of a new energy-efficient stone house originally intended as student housing for our Green University® Immersion program Our hope was to build a structure that is fully passive solar, with no need for wood, gas, or electric heating... although I planned to include a fireplace for insurance, comfort, aesthetics, and to help dry the air out as needed.
But before we did anything else, we had to dismantle and recycle the existing trailerhouse on the site. The trailer wasn't in good enough condition to sell, so we tore it apart and recycled everything we could. The kids and I did some prep work--removing the fixtures, cabinetry, and interior walls. Then we hired five teenage boys to come over and dismantle the trailerhouse as part of their fund-raising effort for a school trip. In one day, we took apart everything from the roof on down to floor level.
Most people would have paid someone else to dispose of a trailerhouse, possibly smashing it to pieces and landfilling it at a considerable expense. But we looked at it as a valuable resource for building materials. The aluminum siding, copper piping, electrical wire, and scrap iron went to the recycling center, fetching $225. We recycled hundreds of dollars worth of fiberglass insulation from the trailer into the attic of Granny's Country Store next door, to help save energy costs there. We set aside the windows for my mother's greenhouse, and piled up hundreds of dollars worth of lumber to use in the new building project. We saved the steel trailer frame for building the deck. We hauled surprisingly little to the dump, except for things like the old carpets and wet or mice-ridden insulation from under the trailer. Actually, I wish I would have saved those carpets for a landscaping project... they work well as a ground cover when the bottom side is placed upward.
Our interns, Brian, Robert, and Mike, showed up April 6th and 7th, and we went right to work. It took a couple days to dismantle the floor of the trailer, but we got lots of good lumber out of it.
Although I talk a lot about doing detailed design work ahead of time, the reality is that we have a tendency to make it up as we go along. In this case, we developed a house plan over the winter, then measured the site two days before the excavator was scheduled to dig the hole, and decided the house plan was just too dang big. We quickly reduced the floor plan and drew up a new outline. It was lacking in detail, but good enough to get us started. The excavator dug a big hole and made a huge pile of fill dirt on our not-very-big building site. Then we were ready to build!
We framed the footings entirely out of scrap lumber. The 2 x 6 floor joists from the trailer were all notched throughout, and useless for anything else, and many of them warped almost as soon as we pulled them out of the trailer. But we ripped the paneling from inside the trailer into narrow strips and screwed it onto the 2 x 6's to pour our 9-inch footings. Even the wooden stakes used around the footing were made from recycled lumber. Admittedly, working with the warped boards made it challenging to straighten and level the footing forms, but we did the best we could.
We could have saved a few dollars by ordering concrete from the closest town, but I wanted to increase our use of fly ash as an environmentally friendly alternative to cement. The local fly ash is a waste product scrubbed from the flues of coal-fired power plants in eastern Montana. Fly ash has some cement-like properties, and in many ways improves the qualities and strength of the concrete, but much of it is hauled from the power plants to landfills as a waste product. Using it in place of cement helps to conserve energy, since cement production is very energy intensive. I asked for the highest fly ash replacement recommended by our ready-mix supplier, and got six sack cement with 30% fly ash replacement. That means that there would normally be six sacks of cement per cubic yard of mixed concrete, but in this case they replaced 30% of that cement with fly ash.
The use of fly ash in concrete is somewhat controversial. On the one hand, it makes good use of a waste product, while conserving natural resources, energy, and carbon dioxide emmissions by negating the need for some of the cement that would otherwise have to be produced. On the other hand, fly ash can contain trace concentrations of toxic elements leftover from burning coal, including arsenic, barium, beryllium, cadmium, chromium, copper, lead, mercury, molybdenum, nickel, radium, selenium, thorium, uranium, vanadium, and zinc. Coal is black due to its carbon content, and that carbon is typically vented to the atmosphere when coal is burned, leaving behind about ten percent of the original mass of the coal in the form of fly ash. That means that the concentration of toxins is about ten times as great as it was in the original coal. I've never heard of anyone being afraid of the toxicity of coal or coal dust, but when it is concentrated by ten times, then some people become very concerned about the toxicity. Personally, I think the benefits outweight the concerns, and it is far better to lock this stuff up in concrete than to pour millions of tons of it into landfills, then dig up even more coal and burn it to convert limestone into cement. The ultra-small particle size is the principle conern, so it is important to wear a good dust mask while working with dry fly ash.
Weather can be a bit of a challenge here in the spring. Ironically, it was so warm and dry in January and February that we could have started building then. But we often get most of our winter's moisture in the form of rain and snow in March, April and May. We were especially glad to get it this year, after suffering through six years of drought. People here were practically dancing in the streets after every rain and snow storm, but the cold, wind, and wet weather was a bit overwhelming to our interns who came here expecting spring and summer. They have been living in a tipi next to the construction site, and had to take time out to fix the tipi once after the wind blew it over. Tipis are actually highly wind resistant, but they have to be tied down in the middle to function properly. It is tied down securely now.
After the footings were poured, we framed the foundation walls using beadboard structural building panels free from the scrap pile at the factory in nearby Belgrade. (The factory later started recycling their own panels.) We bought a hot wire to slice through the panels, so we could make them any thickness we wanted. That was especially helpful, since the panel scraps came in several different thicknesses.
 Our formwork was almost entirely assembled from scrap materials. Here I am running cables through the beadboard panels to connect the inside and outside forms together. |
We framed two different types of walls for the basement. The wall next to the garage and the wall facing the street would be completely hidden from view, and therefore needed no stonework. So, we split the 6-inch panels in half and made our own insulating concrete forms (ICFs), at a savings of several thousand dollars, compared to buying the new, snap-together forms. Of course, it took us a bit longer to frame all the walls this way, but it was worth the extra trouble. For "whalers" to reinforce the walls during the pour, we used 2 x 4s recycled from the trailerhouse. The walls were tied together for the pour in several ways. First we used threaded rod, but it was too expensive and we bought out all the rod we could find in every local town. So, we switched to some electrical cables, which were in the garage when we bought the place. That worked well, so when we ran out of that, I bought some barbless two-strand fence wire to finish the job.
The challenge was that we had to put one side of the forms up then put the wires through, set up the other side of the forms, and then feed the wires through that side. Basically, we had to squeeze inside the forms to push all those wires through, but it was pretty easy to do as long as we propped the forms apart like a wedge, started at one end, and closed the wedge as we worked our way out.
Spacers were more problematic than the ties, but we had the walls spaced at the top and the bottom, with a handful of pipes wedged in the middle of the wall to spread that part. The formwork wasn't perfect for sure, but it cost almost nothing. Actually, I bought a handful of insulating concrete forms to construct two stubby walls which will eventually support a fireplace on the main level. The formwork for those two little walls cost as much as all the rest of our formwork put together!
The other two sides of the basement were framed with 7 inches of scrap beadboard insulation along the inside, and two levels (four feet) of our reliable old slipforms on the outside. The first three feet of these walls are below ground, so we set the forms to pour straight concrete there. Everything above ground would be done in stone.
We ordered nineteen yards of concrete for the pour, the biggest pour I've ever done. The job went about as well as could be expected for formwork that was entirely patched together from recycled junk. That is to say that it was successful, just not particularly graceful. I've had problems with concrete pours before, where I've had to rebuild formwork in the middle of a pour. I thought this time might be different, and we reached a point where we couldn't think of anything else to do to reinforce the walls, so we decided we were ready.
Our biggest concern was the tall walls. A major blow-out there would kill the whole project. Naturally, that is where we focused most of our reinforcement work. One small panel did pop out at a joint and we had to move the concrete truck around to pour another part of the basement while we patched the hole and bucketed the spilled concrete back in the wall. Actually, I was relieved that the tallest, most risky part of the pour went so well. We finished bucketing the concrete back into the wall, and I climbed up to the top, just in time to see one of the short walls give way!
I consistently underestimate the power of wet concrete under the force of gravity, thinking that we can get away with less reinforcement on something that is only three feet tall. Will I ever learn? We stopped to assess the problem, made some quick fixes to the rest of the short walls, then moved the concrete truck around to keep pouring, while a few of us put the wrecked formwork back together. Fortunately, we had a big enough crew with myself and the interns, my sister and neighbors, that we were able to do everything at once. We patched the wall back together and everyone there looked it over and said it should hold this time. It didn't.
I have a real love-hate relationship with concrete. I should give it up, but I enjoy building so much. Unfortunately, just about every stone house project has concrete under it, and I work at bracing the walls until I reach the point where I don't feel like doing any more. Then I convince myself that the rest is in good enough shape.
I was glad for the fly ash replacement in the concrete, because it seemed to set up more slowly than it would have otherwise. We had the cement truck pour the rest of the concrete in a pile, and we rebuilt the failed wall and shoveled all the concrete back in. We also laid the first row of rocks into some of the forms and filled in behind the rocks with concrete. Our walls turned out a bit wavy here and there, but everything on the outside would be buried, and I don't mind having wavy walls on the inside of the basement. Like I said, the concrete pour was successful, just not particularly graceful.
We took a break from building for awhile and brought the local junior high kids out camping. We had the seventh graders for two days and the eight graders for two days. This was the fourth year we have taken the junior high kids out like this, and the fourth time we have been deluged by more than an inch of rain while we were out there. The kids have built some substantial shelters out of sticks and bark to keep us dry, and we just keep adding on every year. It is always a blast, even with the wet weather.
Back on the job site, we connected the sewer pipes from the existing septic tank to the new building. We hoped to install a composting toilet and greywater filtering system, but it would be foolish not to connect to the septic system since it was there. We were able to use recycled PVC pipe from the trailerhouse, so we only had to buy three new fittings to make the connection.
Finally, after a month of building our stone house, we were ready to get set up for stone work. We started by building insulated window frames from scrap beadboard panels. Since our walls were significantly tweaked from the concrete pour, we had to build a temporary framework of 2 x 4s to establish a straight and plumb plane for the walls. We attached the window and door frames to the framework, then screwed the slipforms to the frames.
It was our plan to find a nearby source of rocks and bring them back in the truck, but we scrapped that idea back on the day the excavator dug the hole for the house. There were plenty of nice roundish river rocks on the site already. We just had to extract them from the mix of sand, gravel and dirt that came out of the hole with the rocks. We didn't dig into the big pile in search or rocks, but we gathered all that we could find on the surface and started doing stonework. A couple from Missoula, Montana came and stayed with us for three days to learn stone masonry techniques.
We ordered ten yards each of sand and gravel, plus some sacks of cement, and I bought an 1800 pound bag of fly ash. Our mix consisted of one part cement to three parts sand and three parts gravel--except we substituted fly ash for one-third of the cement. The bag of fly ash had to stay in the back of the truck for awhile, since we had no means to unload it anyway. We set up the cement mixer and started mixing our own concrete, one wheelbarrow-sized load at a time. Now that I can handle!
Doing the stonework may be the easiest part of building a stone house. Our interns had no previous stone masonry experience, but with the aid of the forms they were immediately able to start building quality stone walls. With a crew of four people we would typically have two people laying rocks in the forms, one person mixing concrete, with the fourth person bucketing concrete from the wheelbarrow to the wall. We pour the concrete in the forms behind the rocks, then use our rubber gloved hands to agitate the mortar in around the rocks. The goal is to get enough concrete around the rocks for a good bond, without the concrete coming all the way to the front of the wall where it will run down the face of the rocks.
For steel reinforcing, we added horizontal runs of rebar every six to twelve inches as we progressed up the wall. First we placed a row of stones, then the concrete, then the rebar, and then more concrete to cover the rebar, and then another row of stones. The vertical rebar was put in place before we poured the concrete foundation wall, so we didn't have to worry about that, except that we had to either cut it or bend it wherever it intersected the window and door frames. Then we added more vertical rebar in the sections of wall between the windows and doors to make up the difference. From a labor standpoint, the more windows and doors the better, since it saves on concrete and stonework!
In short order, we completed the stonework to the tops of the window frames. We were blessed with some great June rains, but sometimes we got caught in the middle of a project, and the rain washed cement water down the faces of the rocks inside the forms before we could cover everything with tarps. That makes the walls a bit more grey, but really doesn't look bad. It tends to give the walls more of a historical patina. This building is going to look old by the time it is completed. Visitors might assume that the building has been here as long as the town itself.
With the stonework all the way to the tops of the windows, we stripped off all the forms, chipped away any concrete that adhered to the face of the rocks, and hired a backhoe operator to come backfill around the basement. The working space was tight, but the backhoe operator proved to be very adept, working confidently and quickly within inches of the building. We backfilled all the way around the basement, and also dug a trench to connect the freshwater line from the well into the new building.
We needed a lot more rocks to continue our stonework, so we grabbed them from the dirt pile as the backhoe turned them up. The operator would scoop up a load of dirt, then back away from the pile to dump it around the basement. I would go in behind the backhoe to pick up any good rocks I could find. Then, when he dumped the load around the basement, our interns were there to pick up any rocks that were revealed on that end. Our operator was very patient with us that way, as not every person would appreciate us being underfoot so much while working. By the time the hole was filled all the way around the basement, we had several very nice piles of rocks to build with.
After backfilling, we put the slipforms back up to finish bringing the basement walls up to the eight foot level. There was less than a foot to go most of the way around, so the work seemed to go exceptionally fast. In short order we reached the eight foot level, and we were ready to build the main floor, making a ceiling over the basement. But, like a lot of things, we hadn't yet fully resolved how best to do that.
Floors and roofs tend to be the most expensive part of any house, mostly due to the amount of lumber involved, and the price of lumber has doubled since we built our own house in the early 1990s. The excessive use of lumber in this country is also not very sustainable, mostly because roads are bulldozed into pristine woodlands to cut down the trees. I would like to one day have my own woodlot for building logs, so that I can make sure the resource is harvested in a truly ethical way. I've also been wanting to try out some experimental building techniques using wooden beams combined with a cement slab floor to reduce the total amount of lumber needed, but after discussing it extensively we came to the conclusion that we should test the idea on a much smaller project first. Besides, after working hard through April and May, we were all feeling a bit of building fatigue. We wanted a fast way to build the main floor on top of the basement just to get it over with. We finally decided to go with some kind of wood framed floor, but in all of our hesitation, we reached the point where we were ready to build, and didn't have any materials on site to work with.
I tried to order rough cut 4 x 10s for the main beams, but none of the local sawmills had them available or could cut them in a timely manner. Ditto for 2 x 10s. While we researched the best options to build the floor, we proceeded on with anything else we could find to work on.
We still had the steel trailer frame left over from the trailerhouse we dismantled, so we cut that apart with metal cutting blades on the Skilsaw. We built a temporary wooden support frame, then welded the deck together on top of that. I really enjoy welding, although the process is kind of slow and tedious compared to other types of construction, and it was a monumental distraction to the rest of our building process. We built the entire deck in the air (on the support frame), then used the trailer axles as support posts and welded those to the deck. Rather than pouring the concrete pads first, it was much easier to wedge the support posts in on top of some scraps of foam insulation to hold them securely while we welded them to the deck. Then we removed the insulation scraps so the legs were hanging in the air, and we poured the concrete pads under them. We used some plastic buckets with the bottoms cut out as forms, so the concrete spreads out like an upside down mushroom underground, with only the round pads sticking out above ground. Pouring the pads under the deck reminded me of the quote from Henry David Thoreau, "Build your castle in the air, then put the foundation under it." I enjoyed that a lot.
On the house side, the edge of the deck sits right on the stone wall. For extra security, we welded connecting rods from the deck to the rebar sticking up out of the wall, and then we were able to safely remove the wooden supporting frame.
While continuing to resolve our lumber dilemma, we went ahead and started on the ground floor of the basement. When the backhoe operator was here, we had him drop some fill material over the wall into the basement to bring the floor level up a few inches. We leveled the floor as well as we could, then rented a gas-powered tamper, called a "Wacker", and thumped the whole floor down good and solid. I think a Wacker is kind of a fun toy - a bit like a really heavy one-legged kangaroo. You wouldn't want to get your foot under it!
Next, we laid out a plastic vapor barrier to prevent moisture from wicking up through the soil into the house, as well as to help block any radon gas from entering the building. Then I bought a couple rolls of PEX tubing for the radiant floor. I hope to eventually generate hot water in solar panels and circulate it through the tubing to heat the floor. The tubing was somewhat stiff, so the guys set down a few pieces of rebar across the floor, then wire-tied the tubing to the rebar.
Normally, you would pour an expensive concrete slab over the tubing and put carpeting or tile on that, but there is little need for something as structural as concrete on a floor that is sitting on the ground and has nowhere to go anyway. Tamping the base was the important part to insure that there would be no settling. Then we hauled in sand to cover the tubing. We added a bit of fly ash to the sand to stiffen it up, but at that point we really didn't have enough fly ash to work with, so we basically ended up with a giant sandbox in the basement. Eventually I brought home another 1700 pound bag of fly ash, and we hoed and raked the fly ash into the damp sand base, re-leveled it and then hand-tamped it by thumping it with cinder blocks. That made a solid base for our eventual terra tile floor. More on that later.
We finally figured out our lumber problem for the main floor, to put a lid on the basement. I was able to order some six-inch diameter, machine-peeled logs to use as floor joists, along with an unpeeled forty-foot long log to use as a central beam for additional support under the joists. We continued to tie up some miscellaneous projects around the place, and we grouted the stonework facing the street, while we waited for the logs to be delivered.
The first thing we needed to do when the logs arrived was to peel the long one for the main beam. For that I used our Log Wizard, basically a planar blade, which is mounted on the end of a chainsaw. I hadn't used ours in years, and it was kind of fun peeling the log, so I was somewhat disappointed that I didn't have more logs to peel!
We dragged the peeled beam into place using a come-along. A temporary log placed across the middle of the house kept it the beam from dropping down inside. The beam was cut to fit to the length of the house, and we placed four supporting posts under the beam, drilled holes through the beam, and drove rebar pins in to effectively nail the beam down to the posts. The posts were actually dangling in the air though, since temporary supports were holding up the main beam, then we poured concrete pads under the permanent posts, before removing the temporary supports.
With the main beam in place, it was pretty easy to roll the six inch log joists into position. I was surprised that the machine-peeled logs were not very straight. Since they are peeled on an oversize lathe, I assumed that they would all be exactly the same size and perfectly straight. That was definitely not the case. However, there always seemed to be one side of each log that was remarkably even, so we put that side up to make it easy to nail the tongue and groove flooring on later. We shimmed or notched the logs at both ends and in the middle to make the tops as level as possible. Each log was then pinned down with rebar into the central supporting beam. The space between the joists was set at 25 inches, not exactly a standard measurement, but all the logs seemed to line up best that way with critical parts of the house, such as the stairway and fireplace.
With the log joists all in place, I ordered 2 x 6 tongue and groove decking to make the actual floor. That was the most expensive part, and probably slightly blew my initial hopes of completing the entire house for $10 per square foot. Oh well, we'll look for opportunities to save a few dollars elsewhere in the project.
The tongue and groove decking was surprisingly easy to put on over the round logs. I was quite impressed by just how evenly we had leveled all the logs. While installing the flooring, I kept the chainsaw handy and used it to plane off the tops of the logs where they stuck up too high, plus we shimmed a few low spots, but all in all, the joists were nearly as flat across the tops as the tongue and groove lumber we nailed down on top of it.
The interesting thing about tongue and groove decking is that the really nice side is nailed down not up. On our project, the nice side of the lumber forms the ceiling in the basement, and makes quite a pretty scene, I think. The rougher side of the lumber goes up, and you can place the nails in on the tongue of each board, such that it will be covered by the groove of the next board placed against it, but we don't intend to have the wood floor showing upstairs. I know from experience that a solid wood floor like that can be awfully noisy when someone is walking around upstairs while you are listening downstairs. Besides, dust filters down through the cracks between the boards, unless filled with something like an epoxy resin. In our case, however, we plan to make soil-cement terra tiles upstairs, so that will deaden the sound and stop the dust. The key is to keep the floor protected until we finish the rest of the building.
Mike, one of our interns, spent much of his time job hunting while he was here. He left a few times on job interviews, hopping all over the country, and finally landed a really nice position teaching science in Colorado. He left near the end of June. He was a great help all the way through. Thanks Mike!
Robert, Brian and I didn't do too much more on the project, other than mix the fly ash into the basement floor to solidify the sand. We mopped several coats of exterior latex paint over the wooden floor to project it from the rain. But the reality is that we had worked hard through most of April, May, and June, and summers are awfully short here in Montana, so we parked the building project for awhile and switched over to summer projects - things like primitive skills, hiking, and camping.
The one task we planned to do on the house during summer was to seal the wooden tongue-and-groove floor to protect the wood - and to make a dry, semi-livable space in the basement. However, that little task proved to be more challenging than I imagined. I bought a five gallon bucket of black floor epoxy at the Habitat for Humanity Restore, basically a thriftstore for building materials. I figured I could just mop the epoxy on for a good and quick watertight seal. It seemed like it started out okay in my test area, but before long the black epoxy seeped through between the boards, leaving black drip marks on our pretty new basement ceiling. Additionally, the warmth of the sun created hundreds of bubbles in the epoxy on top of the floor.
Next I tried some secondhand latex and acrylic paints, which didn't drip through, but didn't seal the gaps between the boards either. I couldn't just hop in the car and run over the Restore for supplies any time I want, since it is seventy-five miles away, and only open on certain days. That makes the project take a bit longer, since I can only pick up supplies when I am going that way for something else. It took most of the summer (between hundreds of distractions) to mop on a couple coats of latex paint, but the rain still poured right through the floor between the boards. The latex paint just wasn't enough to seal the cracks. So, we eventually bought a bunch of caulk from the Restore, and started caulking the lines. That helped, but not enough. Brian tried moving into the basement, but got soaked when it rained.
Fortunately, I had a sheet of galvanized tin salvaged from the roof of the trailerhouse, which measured 12 feet wide by 56 feet long. I hoped to save it for some other projects, but finally decided it was a necessity for this one. We cut it into three pieces and covered most of the floor, creating enough dry space for Brian to camp out in the basement. Otherwise, we left the project alone until September.
Continue with Part II: September, October & November 2005
Check out Living Homes: Stone Masonry, Log, and Strawbale Construction.


 DirtCheapBuilder.com


